AUTOMATIC RADISH CUTTER |


|
 |
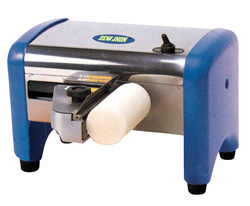
| Turn it on after putting a radish into it , then the blade holder fixing a blade will move and cut the radish. You can clean it up easily by disassembling it with simple tools and cut a radish in 1 mm or in 2 mm by changing blades. |
|
 |
Model NO. |
SNS - 100 |
Dimension(W x L x H) |
400 x 350 x 260mm |
Motor |
150W |
Weight |
20.3kg |
|
|
|

|
209-11 JANGDONG DAELSEO-GU TAE GU KOREA
TEL : 82-53-581-7781~6
FAX : 82-53-583-2188 |
|
|
Automatic radish cutter manual
1. Installing
1) Install it on even and stable place.
2) Make sure the power switch is off.
3) Make sure the blade is attached properly.
4) Make sure that the blade cover fixes the side blade and that the fixing
handle is fastened.
5) Make sure the blade holder is at the end of left.
6) Connect the plug to the outlet.
* Grounding is necessary
* Be careful in touching the blades.
2. Manual
1) Peel a radish and cut it 12cm by 11cm.
2) Put the container under the blade holder.
3) Make sure that side blades and upright blades are well attached.
4) Put the center of a radish into the axis up to the range of the blade.
5) Turn it on then the blade holder and the spinning axis will operate at the
same time.
6) After operating , the machine will automatically stop.
7) When it stops, turn the power switch off and pull the blade holder up to
the left end.
8) Get rid of the remaining part of the radish from the axis.
9) Make sure there is nothing wrong on the blades.
10) Repeat the direction above when you have a lot to cut.
11) After operating completely turn the power switch off, and pull the plug
off.
3. Cleaning
1) Turn it off and pull the plug off.
2) Unfasten the blade cover fixing handle, take the cover apart and take the
side blade from it.
3) Separate the upright blade from the blade holder by unscrewing the
screws on the even side of the holder.
4) Turn the side blade over, brush the back side. ( otherwise both the side
blade and the brush would be damaged)
5) Wash the blade holder and the spinning axis with water and a brush.
6) Remove all water on the main part with a dry towel, never clean it with
water.
7) Use only neutral detergent.
|
|


|

|
|
|
